
Heya,
It's been a long time since I had enough free time to prepare something more-less useful, so hope you won't feel disappointed while reading this one ;-)
As for the tutorial thing: the zombie standard bearer you see is part of display piece, which I wanted to build for ages. It's sort of tribute to Warhammer Fantasy Battle.
Not that I am some big fan of WFB (or blasted EE at all...) but it was Warhammer Fantasy 5 ed. what dragged me into the miniatures hobby. Nowdays I browse old army books with solid dose of nostalgia which made me create the project.
One of my favorite models from the old range is hell ugly zombie dragon (ok, the dragon is fine but the rider... Ouch!) sculpted by Gary Morley. I don't play anymore but the creature would surely look great in the display case. I remember when I was still WFB gamer I couldn't afford this model, now I can but there are no players around so I am kinda chasing old dreams ^^
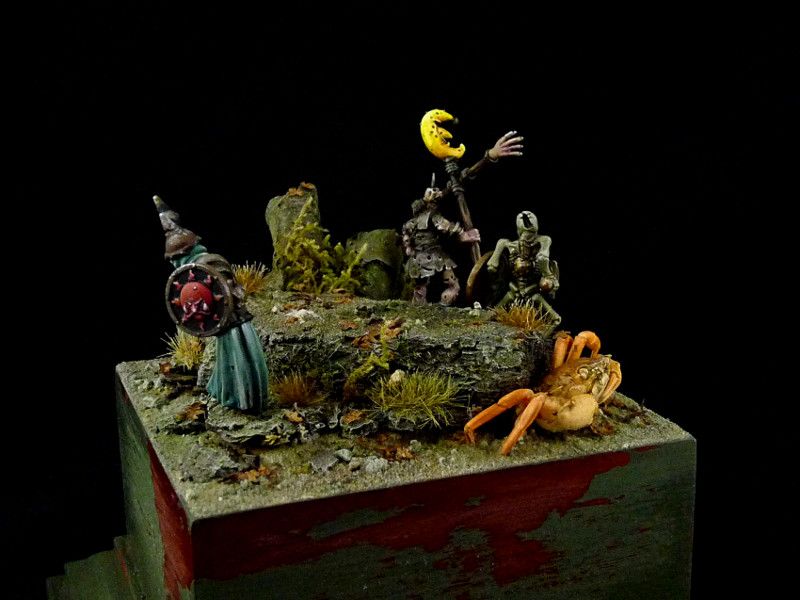
Anyway I checked models in my collection and the idea was spawned:
Anyway I checked models in my collection and the idea was spawned:
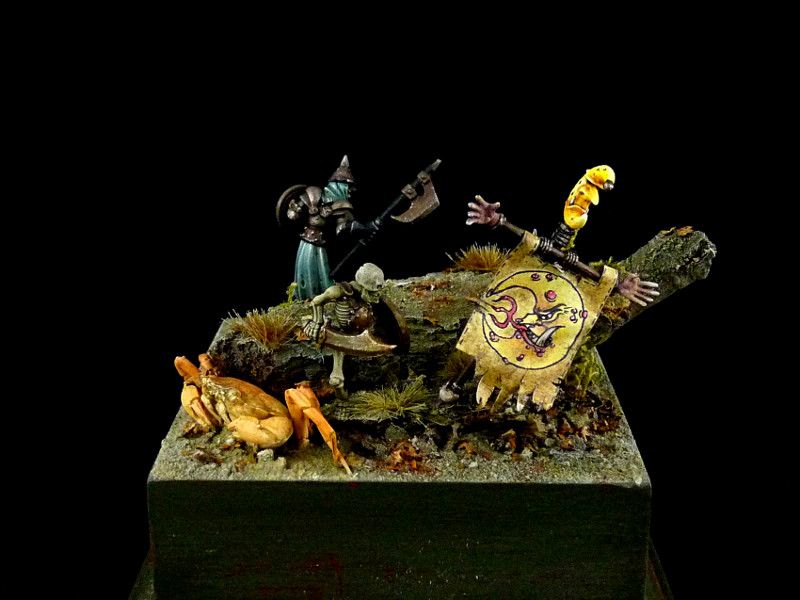
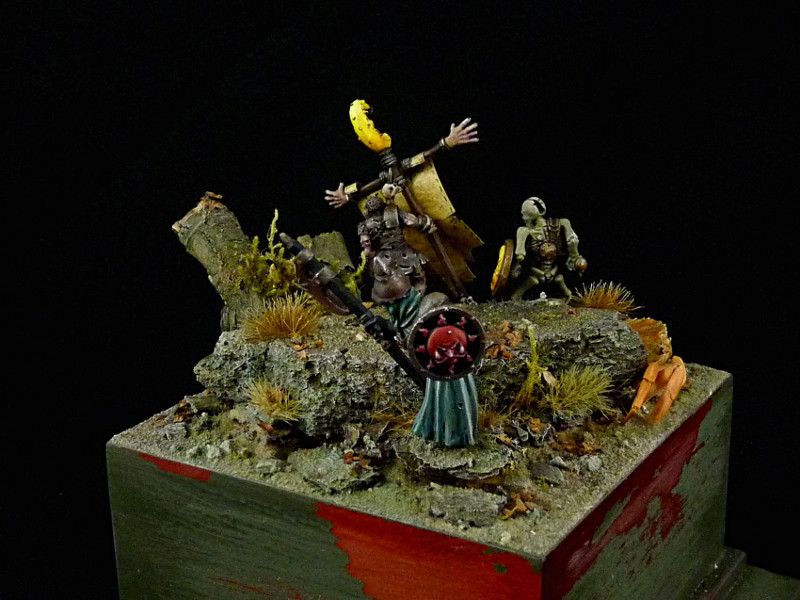
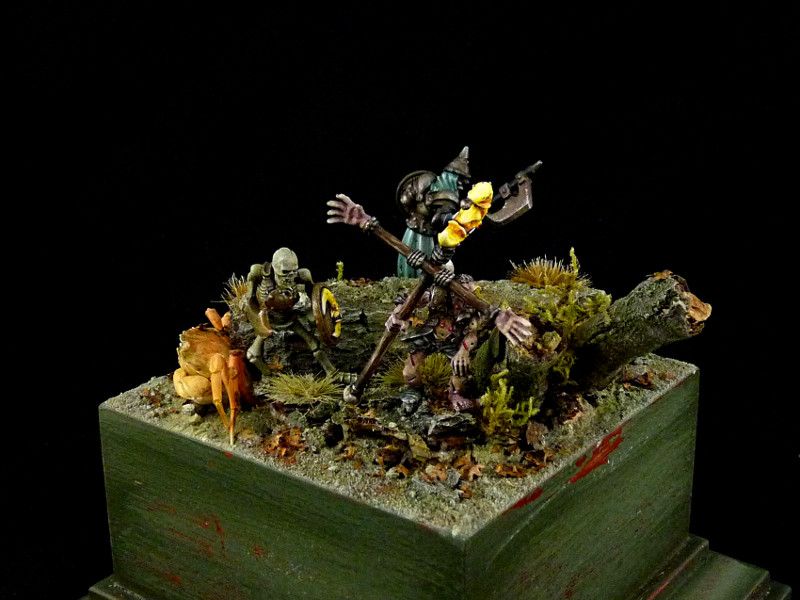
The concept is to build piece of some forgotten marshes through which march group of cursed undead creatures - led by wight of course.
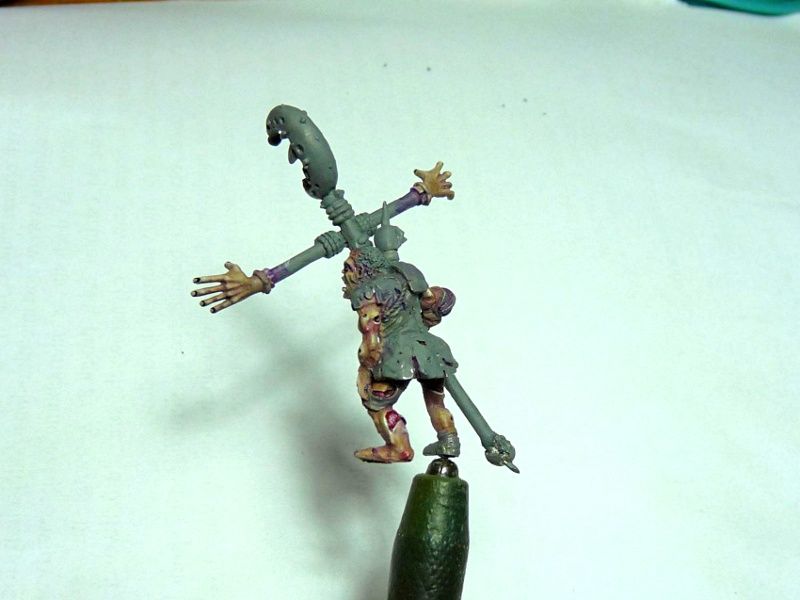
I chose placcy skeleton, really old wight (thanks Skrit!), zombie and zombie dragon. As you can see the base is more-less finished - the only thing missing is water effect and the centerpiece mini. And because I was taking some step-by-step pictures while painting zombie - here's the thing.

The zombie model I decided to use is simple conversion of one of doubled plague zombie from Necromunda range. It had the arm damaged so I cut off the weapon and replaced it with plastic banner pole - it's mix of zombies and goblins boxes. The spikes were taken from Privateer Press Deathjack model.
This conversion was also test model for Dremel tool I purchased last year - definitely well spent money by the way.
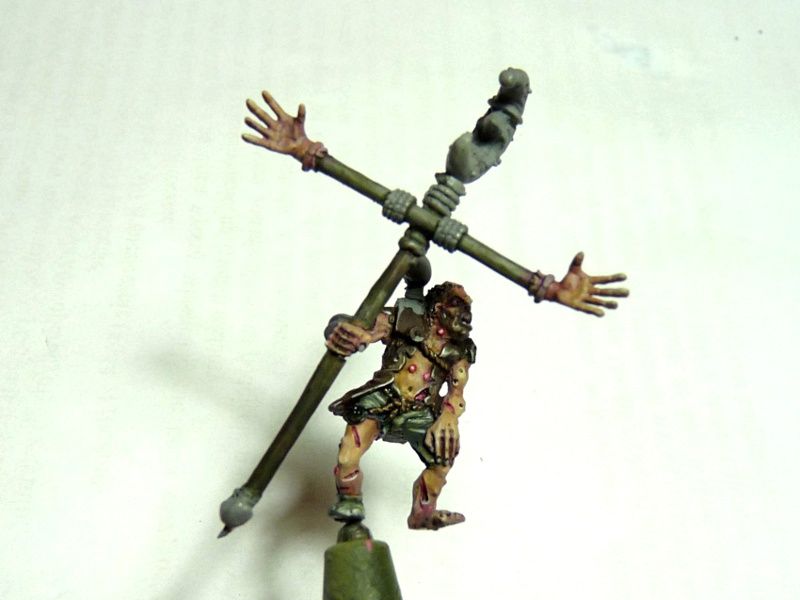
The first thing was applying undeacoat - as usually I chose stone grey tone from Vallejo range - I want the model to be quite colorful and bright (it's tribute to 5ed WFB, remember all those candy-regiments?) so there was no need of really dark basecoat.
Proper painting started with the flesh tone.
Like I mentioned this time I wanted to paint something more colorful than Scavvies so for base coat I mixed Dwarf Flesh, Dead Flesh and bit of Purple Wash.
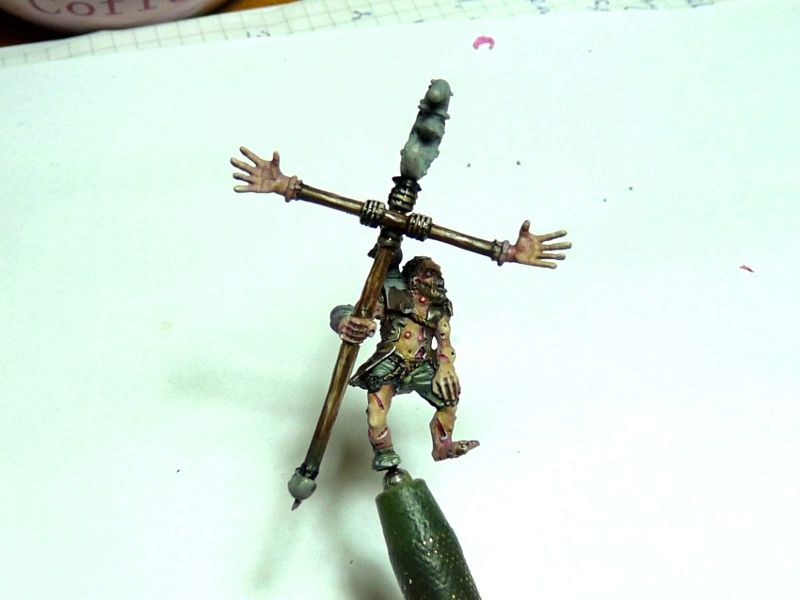
After that highlights were painted with Dwarf Flesh + Dead Flesh, and then I was added some more Dead Flesh and even bit of pure white in the end for some final touches.

The paint is drying so I added some details: holes in the flesh tissue,
teeth, nails, eyes, blisters fresh wounds. As for open wounds I started
with dark brown undercoat followed by Gory Red, Squid Pink
and some white for the edges. To blend the colors I used some Red Ink and voila.You can barely see this but I also painted some 5 o'clock shade on the zombie's face:
don't think a zombie gives a fuck about shaving but I guess the poor man forgot to use the razor before demise. Shit happens, even after death! ;-)

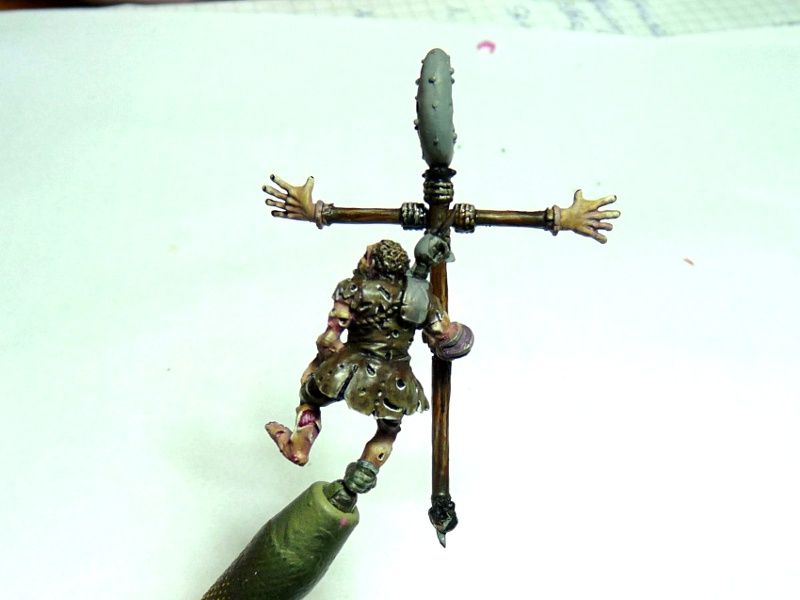
The last thing left to do was glazing the flesh:
it allows you to enchance the colors but also makes any transitions smoother. So I mixed some matt medium, water and chose Purple Wash, Red Ink, Devlan Mud and Yellow Ink. The flesh is now finished - time for the next step...
...which is the jacket (or whatever the rag on the back is).
Usually I choose grey tones for zombie clothes - all the dirt etc but since I wanted something more colorful I started with Charred Brown (deep dark tone) and was adding Earth and Polished Bone for highlights. Some water added to paint allows you to get smooth transitions.
As you can notice the jacket is bit shiny - it's because I added some satin varnish instead of medium - for better paint protection. It's not going to be gaming piece but there's never enough security when it comes to miniatures...
At this stage I also painted zombie hair. Simple drybrush combo: Charred Brown + black, Earth, Earth + white glazed with Devlan Mud was just enough.

Panties and foot bandage:
these are quite small elements so didn't want to paint them striking. The base was Stormy Grey highlighted with mix of Stormy Gray and Aged Bone. For further highlights some pure white was added to the mixture. After paint dried the elements were glazed with Cayman Green and some Yellow Ink - yellow is VERY intensive paint so I always dilute it heavily before using.
As for the ropes - the painting was as easy as painting hair:
I painted Snakebite Leather on black basecoat, drybrushed with Bleached Bone and white then glazed with Devlan Mud. The easier - the better.
Banner pole:
I must confess at first I didn't want to spend much time on this part but simply paint the pole black or other dark color - the reason is there's is quite big banner to be hanged so not much of paintjob would be seen anyway. But then I thought it's going to be display piece so slightly more attention sactificed to the mini shouldn't hurt that much.
For the base tone I chose Snakebite Leather - medium brown tone. Then I painted these "lines" along the pole with mix of Snakebite Leather and Aged Bone and then SL + white. Note it wasn't meant to look like a wood texture but just wanted to break brown monotony.
After that I painted some very dark brown and black lines between bright ones for the contrast and when the paints dried - all was glazed with Devlan Mud and satin varnish. You can clearly see this part shines like hell.
The lines on the pole were painted exactly the same way as ones on clothes, few pictures above.
There are still some details to be finished:
Metal parts is just Boltgun Metal highlighted with Silver and then washed with Smoke, Cayman Olive and some orange.
Skulls on the banner bottm and shoulder pad were painted with Aged Bone, highlighted to almost bure white and then glazed with some Brown Wash, Smoke and Sepia.
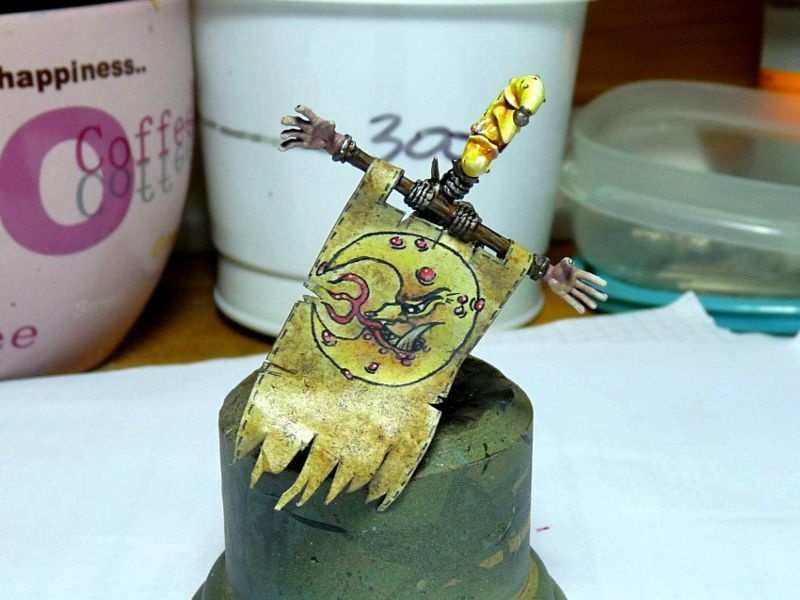
The Bad Moon on the banner top was probably the biggest pain in the ass part of the model - I simply hate painting yellow. I started with pure white undercoat and then glazed it with diluted Yellow Ink and then ink + Golden Yellow. Shadows were painted with some red and orange. And for the final the moon was highlighted with some diluted white.
I am considering redoing this part every time I see the picture so by the time you read this - the model will be probably repainted ;-)

And here's what do I need the model for:
I decided to use Gork and Mork motifs (they are kinda gods of chaos after all) so the dragon rider will be carrying Evil Sun banner and mr zombie - Bad Moon.
Both banners were prepared a while back and sadly no wip photos were taken.
But the general rule turned out to be quite simple: I needed some nice pattern so I copied paper bannes from Orcs and Goblins armybook 5th ed. The icon has been enlarged to fill most of the banner and then I added some details with very thin pen: blisters, the toungue, eyebrow.
But the general rule turned out to be quite simple: I needed some nice pattern so I copied paper bannes from Orcs and Goblins armybook 5th ed. The icon has been enlarged to fill most of the banner and then I added some details with very thin pen: blisters, the toungue, eyebrow.
I used lots of medium and varnish because paper is quite fragile and too much water applied at once could make it much easier to damage. When the model finally stands on the base I will spray it with several layers of matt varnish - both for look and protection.
And below you can see current stage of the project - there's lots of work yet to be done but I really can't wait to see the dragon in the display case.
Till the next time and forgive all the typos! ;-)